• Skip to primary navigation
  • Skip to main content
  • Skip to primary sidebar
  • Home
  • About Us
  • Privacy Policy
  • Terms of Service
  • Affiliate Disclosure
  • Contact Us

Aquarium Base

Trusted online aquarium guide

  • Freshwater
  • Saltwater
  • Reviews
  • Tips & Guide

Guide

SCA 302 Protein Skimmer Review

By Aquabase | Last Updated Oct 29, 2023

You probably think that SCA 302 skimmer is just the same as other protein skimmers available on the market, but you should know that each device is different. That’s why you can always expect this variant to be quite different from the others. It comes with its own specs and also features that will make sure that your fish tank remains clean and hygiene most of the time. But before you buy the device, it would be wise if you can learn a bit about the protein skimmer in general and its basic functionality.

SCA 302 Protein Skimmer and Functionality

Also known as the foam fractionators, the protein skimmer is used, so the organic compounds can be removed from the water, resulting in the water free from waste and food particles. The device is mostly used in public aquariums and commercial applications (such as municipal facilities for water treatment). Of course, the bigger filtration is used for such big facilities. The smaller proteins are used in the saltwater aquarium or fish tank that is generally placed at home.

That’s the basic function of SCA 302 skimmer, in general. Most homeowners who have fish tanks or collect fish will need a device to make sure that the water is clean from proteins, undigested food, and also fish excrement. These elements are tiny but their impact can be crucial – and also damaging if not properly addressed. If you leave these proteins intact, the numbers of nitrite, ammonia, and also nitrate will increase drastically, causing decay and nasty smell. Moreover, bacteria and parasites love this dirty water rich in protein because they will feed on those proteins. Without the skimmer, your tank will be nasty and dirty, and also a perfect breeding spot for bacteria and parasites and germs.

With the skimmer, there are several benefits to expect. First of all, you can make sure that your fish tank remains clean. Second, you can also prevent the chances that your tank will be the perfect breeding spot for bacteria or any other harmful germs. Third, the skimmer will reduce the numbers of algae, which is also responsible for the murky and ugly water. Four, when the water is no longer murky, it means that more lights are allowed to pass – giving your aquarium a clearer appearance. It is also good for the color spectrum since more natural lights are allowed to enter the water.

About SCA 302 Skimmer in Particular

This is probably a small and compact protein skimmer, but you can be sure that this SCA 302 skimmer is able to perform wonderfully – in fact, the result is pretty satisfying and impressive. This skimmer is designed and made with professional quality, including the laser cut implementation so the assembly process can run smoother and better. This is a new version, with an extra big cup and also a silencer. Just because you are going to have the device installed in your fish tank, it doesn’t mean that you should put up with the noisy operation.

The compact device is quite small in size and dimension, and yet it is able to manage quite big fish tank, about 180 gallons of the saltwater environment. The skimmer works with 2000 Atman pump needle system that will make sure that your aquarium will remain clean and clear. A lot of users claim that the skimmer works like a charm – in fact, the functionality is almost 100% perfect. In just about 12 hours, the skimmer will start collecting waste so you also need to make sure that you clean the device properly. In most cases, you may have to clean it twice a week – or at least once a week.

The specification and features of SCA 302

  • The skimmer is able to collect all the waste and make sure that the water will remain clean and pure
  • The skimmer alone is pretty quiet although you don’t activate the silencer.
  • The skimmer seems to have a powerful ability to clean a big tank. You can expect the water to stay crystal clear without any hint of murkiness

What we liked

  • The skimmer is quiet and it works better than expected. A lot of users claim that they are pretty doubtful about the function and usage of the skimmer, considering that it is less than $200. However, they are proven wrong and the skimmer works great.
  • The customer support is responsive and professional. It is nice to contact them and get the resolutions of some of the problems
  • Customers are given with optional drain hose for their SCA 302 skimmer
  • The skimmer will create a different outcome for your fish tank – you should be able to see it once the skimmer is installed. You will see that your fish tank is cleaner with a better view for the longer period of time

What we didn’t like

  • The SCA 302 skimmer collection cup is quite small for some people. It would be so much better if the cup can be a bit bigger.
  • The cup is rather difficult to remove. If you want to do it, make sure to be super careful about it. Otherwise, the skimmate may be spilled back to the sump
  • The cup is connected to the silencer. If you want to clean the entire lid, you will have to disconnect the silencer. For some, it is troublesome because it adds the extra works.
  • The assembly process can be quite confusing. One solution to it is to find the related videos and get the insightful tips from them – you should be able to find the videos on YouTube
  • The drain hose is pretty short

That’s the basic benefit to enjoy from having a skimmer. But then again, you need to remember that the skimmer alone won’t be able to maintain the cleanliness of your fish tank. You need to contribute to the process too by having a regular cleaning to the skimmer. It has helped you with the waste collection – the only thing you can do is to clean the skimmer. In the overall effect, the SCA 302 skimmer can help with its helpful function but you also need to take part in the process.
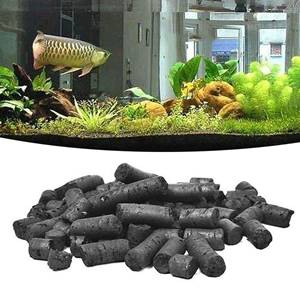
Activated Carbon In Aquarium

By Aquabase | Last Updated Oct 29, 2023

Activated Carbon In Aquarium

Activated carbon is by far the biggest selling maintenance product in the aquarium industry and is one of the most effective absorbents currently used.

However, using activated carbon in fresh or saltwater aquarium is a controversial subject and opinions ranged from “never use it” to “can’t live without it”.

What is Activated Carbon?

When carbon is treated by either chemical (with phosphoric acid or zinc) or thermal (glassification or carbonization) reaction, all impurities are released which open up millions of tiny pores between the carbon atoms. This process gives the carbon a large surface area in contact with water. It can have anywhere from 300 to 2,000 square meters of surface area per gram. This forms the substance we call activated carbon which acts like a highly adsorbant sponge that is highly effective against organic chemicals. The types of activated carbon available today include granular, palletized, and powdered. Granular activated carbon is the one we usually see in the aquarium while pellets and powdered are used in other applications such as air filtration.

How does it work?

When certain chemicals in your aquarium pass next to the carbon surface, activated carbon attracts negatively charged chemical particles with its own positive charge. Negatively charged particles get trap in the porous structure of the activated carbon which inhibits them from re-dissolving back into the water. When the activated carbon is removed, the chemicals are removed with it.

What can be removed and what can’t?

It is important to note that there are certain substances that carbon will adsorb easily while others will not absorb in a significant amount.

Excellent Absorption:

Amyl Acetate, Amyl Alcohol, Benzene, Bleach, Butyl Alcohol, Butyl Acetate, Calcium Hypochlorite, Organic Carbon, Chloral, Chloroform, Chlorine, Chlorobenzene, Chlorophenol, Cresol, Defoliants, Diesel Fuel, Dissolved Organic Compounds (DOC), Dyes (such as Methylene Blue), Ethyl Acetate, Ethyl Acrylate, Foaming, Gasoline, Glycols, Herbicides, Hydrogen Peroxide, Hypochlorous Acid, Insecticides, Iodine, Isopropyl Acetate, Isopropyl Alcohol, Ketones, Methyl Bromide, Methyl Ethyl Ketone, Naptha, Nitrobenzene, Nitroluene, Odors (general), Oil (dissolved), Organic Esters, Oxalic Acid, Oxygen, PCB’s, Pesticides, Phenol, Sodium Hypochlorite, Toluidine, Trichlorethylene, Turpentine, Xylene

Fair/Good Absorption:

Acetaldehde, Acetone, Alcohols, Antifreeze, Chloramine, Calcium Hypochlorite, Chlorophyll, Citric Acid, Ethyl Alcohol, Ethyl Amine, Ethyl Chloride, Etyl Ether, Lactic Acid, Mercaptans, Methyl Acetate, Methyl Alcohol, Methyl Chloride, Organic Acids, Organic Salts, Ozone, Potassium Permanganate, Propioc Acid, Propyl Acetate, Propyl Alcohol, Propyl Chloride, Radon, Solvents, Sulphonated Oils, Tannins, Tar Emulsion, Tartaric Acid, Xanthophyll

Poor or no absorption:

Ammonia, Calcium, Carbon Dioxide, Fluoride, Formaldehyde, Lime, Magnesium, Manganese, Microbes, Molybdenum, Nitrates, nitrites, Phosphates, Selenium, Sodium, Iron and other heavy metals

Note: Alkalinity and water hardness will not be affected by the use of activated carbon.

How much should I use, and for how long?

Because every aquarium is different and the quality of the activated carbon is different from a brand to another, it is almost impossible to recommend a specific amount of activated carbon.

Some activated carbon products give recommendations while others give no indication at all. For ongoing maintenance, I use 1 cup of activated carbon per 50 gallons and change it monthly. When I use a high grade activated carbons such as Tri Base Pelletized Carbon, I use half a cup per 50 gallons and change it every 3 months. Independent research has shown that “more is better” when using activated carbon. The greater quantity of carbon will work faster and longer than a lesser amount.

For Activated Carbon to work effectively, you should filter the water mechanically before it reaches the carbon.

Activated Carbon de-adsorption

We are often told that exhausted activated carbon will leach adsorbed substance back into the aquarium and cause problems. To avoid this, we are told to replace old activated carbon monthly. This assumption is actually wrong. De-adsroption can only be done by switching from one pH extreme (very acidic or basic) to the other pH extreme. These extreme pH values are way outside the normal range of aquarium so don’t worry about de-adsorption.

If you leave activated carbon too long without changing it, it will no longer be effective as an adsorbent and will instead become part of the biological filtration.

Medication And Activated Carbon

Activated carbon effectively remove medications from the water. So whenever you use medication, first remove any carbon in your filtration system. Once you are done with the treatment, put some carbon back in your filter to remove the medication.

Activated Carbon And Trace Element

A big problem with Activated Carbon is that it also removes some of the good things such as trace elements. Activated carbon actually has a greater affinity for organics than trace metals. Actually, the uptake of substances like iron, manganese, molybdenum, cadmium and zinc is extremely limited and is insignificant if used only occasionally. Saltwater aquarists should also keep in mind that protein skimming will remove much more trace elements than activated carbon.

Phosphate In Activated Carbon

The other problem is that carbon carbons can leach phosphate into the aquarium water. The phosphate can be a naturally occurring part of the carbon or it can be from phosphoric acid which is used in the activation process. If you have problems with phosphate, the best thing to do is to switch for another brand of carbon. One way to tell is to look at the product label. If the label talks about the carbon process of using oxygen, carbon dioxide or steam, then it is truly phosphate-free. If the activated carbon is simply marked “phosphate-free”, you can assume it was steam activated. If the label does not mention about the activation process and does not mention “phosphate-free”, ask the vendor or switch to the other brand.

Change The Water in a Fish Tank Easily

By Aquabase | Last Updated Jan 21, 2019

how to change the water in a fish tank

There are pros and cons to change the water in your fish tank, but when done right, it is the one thing that can drastically increase the quality of life that you are maintaining your aquarium life. No matter how efficient your fish tank filters may be, you will still need to change the water from time to time if you expect to have vibrant and healthy fish.

Other than ammonia, nitrite and nitrate levels which are usually eliminated by our beneficial bacteria, changing the water will help remove debris and other chemicals that tend to build up in a fish tank. What we will discuss here is some of the tips and recommendations to make the task of changing the fish tank water easier and some of the things that you need to be careful about when changing the water.

How Often & How Much

Once, fish enthusiasts had recommended that the change be changed once a month but it now commonly believed that once a month is just not often enough. Changing the water that infrequently will place a strain on your fish tank filters to work harder and also cause your fish to have to live in unclean the water for extended periods of time.

What is commonly practice now is a system of changing water a little at a time and more frequently. You can schedule your change in two ways. You can plan a water change every two weeks, changing only half the water in the tank or once a week changing about 20% of the volume.

Tips on Change The Water in a Fish Tank

How to change the water in a fish tank? Use a siphon rather than a bucket or scoop to remove the water from the tank. You can either purchase a battery operated siphon or simply use a rubber tube. To do this, first fill the tube entirely with water. Place your thumbs over the ends of the tube to prevent the water from escaping. Place one end in the fish tank water and the other outside where you want to dump the water and release your thumbs. You need to ensure the opening of the tube in the tank is always higher than the opening on the other end.

When siphoning, suck up the water from the bottom of the tank to remove as much muck as possible. This muck will gradually build up, forming from excess food and fish waste and can be really bad for the health of your fish. It would be a good idea to rake through the gravel before siphoning to release as much muck as possible. However, if you have planted your fish tank plants in a substrate at the base of the tank, then just siphon the water from the middle to avoid sucking up the substrate.

Cautionary Measures

Remember to condition the water before performing a change of water to remove chlorine and chloramines. Do not use direct tap water. Let the water sit in a bucket for a day first and treat it with a water conditioner.

Test the pH levels of the water before adding it in. It would be ideal to get the pH level of the new water to be the same as that of the aquarium water.

For salt water fish tanks, try to get the water at the same temperature and salinity as the fish tank water before adding it in.

Never change the entire tank of water at one go unless it is an emergency. Doing that will put the fish in a stressful condition and can kill it. As mentioned earlier, if you are changing it twice a month, then change not more than half the tank and if once a week, 20% at a time.

Sanitize your hands first, especially if you might need to get them into the water.

That Fish Place carries a wide range of tools to aid your water changing tasks, including siphons and water conditioners.

Best Aquarium Substrate for Planted Tank

By Aquabase | Last Updated Feb 24, 2019

best substrate for planted tank

There is an essential substrate for each type of aquarium. If you were growing live plants in the tank, choosing the best aquarium substrate is an important decision that will have long-term effects on your plants because many live plant species draw their nutrients from the substrate. Each plant has different requirements, and you should consider the resources of each available substrate material and use what better meet your plant’s needs.

On this post, we will have a look some of the most important things to consider when choosing the best substrate for planted tank and some of the commonly used substrate materials. Also, we will share some substrate ideas that can we use for plants to help you get started on the right foot.

Planted Aquarium Substrate

Before we use a substrate for planted tank, there are some things to consider in choosing the right material.

# Should be Fluffy and oxygenated

A good substrate should be not too soft also not too dense, that mean it provides good circulation and root penetration. Some substrate materials will compact rapidly while some others will stay fluffy for a long while.

Unfortunately, every substrate will eventually compact over time and not get oxygenated very well. In anaerobic condition (without oxygen), toxic substances such as hydrogen sulfite may build up. In addition, a solid substrate will prevent nutrients from reaching the plant roots. So, here are a few tips to keep your substrate fluffy and oxygenated for a long time:

  • Mix the aquarium substrate on a regular basis or adding Trumpet snails that will burrow through the substrate, will help to release gas before they build to deadly proportions. This will also keep the substrate fluffy oxygenated.
  • Use light material such as vermiculite and perlite in your substrate. This will makes it fluffy and oxygenated.
  • The grain size is important. It should be selected such that it is neither too fine nor too coarse. Too fine materials will tend to become solid over time. Gravel that is too coarse won’t offer a very good foothold for the plants and excess fish food, and waste can settle into it which eventually lead to water quality problems in the long run. The best grain size is about 2-3 mm.

A deeper substrate (3+ inch) does not get oxygenated very well and may compact faster. When the aquarium substrate is too thick, or becomes compacted and can lead to hydrogen sulgide buildup.

# Inorganic vs organic materials

Organic materials will eventually decay which will eventually bring problems such as hydrogen sulfide formation. Organic materials offer a short-term supply of nutrients which will eventually have to be replenished with solid fertilizer, so you might as well just use inorganic materials and avoid the problems associated with decaying organic matter. In most case, the organic substrate must be replaced after a period of 12 to 18 months.

Many aquarists will use a couple of handfuls per 20 gallon tank as a first layer to give a little boost at the beginning. That quantity should not be a problem in the long run.

# Not too deep, not too shallow

The depth of the substrate for planted tank is really important. The best way to find how deep your substrate aquarium must be is to know what plants you want to grow.

Plants species such as Anubias, Mircosorium, and fern could do without substrate while plants such as Echinodorus and Cryptocoryne will requires plenty of room to grow their root systems.

A sloped substrate (shallow in front and deeper at the back) can be a great way to accommodate all plants. Larger plants with correspondingly larger root systems in the back, smaller plants with correspondingly small root systems in the front.

As a rule of thumb, 2-3 inch at the back should be enough for most large plants. In less depth, deep-rooted plants will become entangled and the aquarium plants will suffer from a lack of nutrients.

# Nutrients

Preferably, the planted aquarium substrates should be filled with ample amount of nutrients in forms that can be readily absorbed by the plants. The easiest way the substrate can be fertilized is by using substrate materials that are already rich in nutrients. Otherwise, there are fertilizer tablets which can be purchased and pushed down into the substrate, releasing nutrients over time.

It is important not to overdose nutrients in the substrate. A substrate that is too rich will eventually leak nutrients and trigger algae growth. To prevent the substrate to leak, it is a good idea to use substrate materials that are rich in nutrients such as clay, peat and soil as a bottom layer and to top it off with another material to seal it.

The Captation Exchange Capacity (CEC) is also an important thing to consider when choosing your aquarium substrate. CEC is the ability to adsorb positively charged nutrient ions (so high CEC is good). This means the substrate will hold nutrients and make them available for the plant roots. It doesn’t indicate a number of nutrients the substrate contains.

# Effects on water chemistry

Some aquarium substrate materials will dramatically change the water chemistry. You have to make sure it is not loaded with limestone or calcium that can lead to uncontrolled hardening of the water. You want it to be inert. If in doubt pour some muriatic acid on the substrate material you want to use. If it bubbles, fizzes, smokes or dissolves then avoid it.

The Best Substrate for Planted Tank

Here is a short list of aquarium substrate materials that can be used as the substrate for a planted tank. Some of them can be used alone while some others should be mixed with other materials.

1. Eco-Complete

CaribSea Eco Complete planted tank substrate

CEC: High | Inert: Yes | Organic: No

Eco-Complete is one of the best planted aquarium substrates today. This is a well balanced and easy to use. Eco-Complete that doesn’t require too much rinsing, which something most don’t like to do.

It comes with essential nutrients and minerals needed for live plants and will not impact your water parameters. The grain sizes are within range for optimal root growth and the appearance is a deep black sandy gravel. It’s also rounded gravel and poses no threat to bottom feeding fish which may hurt themselves on the sharp-edged substrate. This substrate can be expensive, but it’s worth the money. It can be used on its own, mix with other ingredients or as a top layer.

2. Flourite

Flourite best substrate for planted tank

CEC: High | Inert: Yes | Organic: No

Flourite is a clay based substrate with a reddish color that comes from its high iron content. It is very rich in nutrient. Nutrients in it won’t leak into the water column. In addition, Flourite doesn’t get soft in water. Like Eco-Complete, this substrate can be use on its own, mix with other ingredients or as a top layer.

Unfortunately, Flourite needs to be rinsed extensively before putting in an aquarium. Otherwise, it will cloud up the water. It doesn’t have as many minerals and nutrients as other planted aquariums substrates, but it’s still an excellent choice.

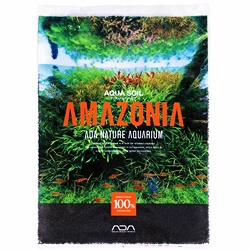
3. ADA Aquasoil

ADA Aquasoil planted aquarium substrate

CEC: High | Inert: Yes | Organic: No

ADA Aquasoil the best-planted substrate money can buy. Made up of round grains, the substrate maintains gaps allowing for water circulation to prevent roots from suffocating. Aquasoil also acts as a passive filter, capturing floating particles.

This substrate can be expensive, but it’s worth the money. It can be use on its own, mix with other ingredients or as a top layer.

I never tried Aquasoil so can’t tell much about it. It’s certainly a good choice but I always try to stay away from it because of the price.

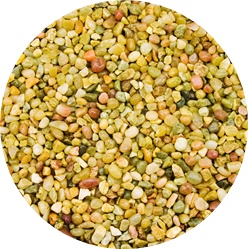
4. Fine gravel

Fine gravel substrate

CEC: Most have a low CCE
Inert: Should be. May contain calcium carbonate which may raise your pH undesirably.
Organic: No

It can be used alone or mixed with other aquarium substrate materials. When used alone, regular gravel is certainly not the best but it works. Gravel contains no nutrient for the plant’s so more intensive fertilization will be needed.

Another way to use gravel is to mix it with other substrate material or to use it as a top layer to seal the bottom layers, so they won’t leak nutrient into the water.

5. Sand

Carib Sea aquarium sand

CEC: Low
Inert: Should be. May contain calcium carbonate which can increase pH undesirably.
Organic: No

Can be used alone or mixed with other aquarium substrate material. We need more intensive fertilization if used alone because sand contains no nutrient for the plants.

Many aquarists use sand as a top layer but it makes planting stem plants difficult because it is not heavy enough to hold the plant in place. In addition, sand is not very effective for sealing nutrient into the substrate which may cause problems. Finally, most sand will compact over time.
On the other hand, sand is generally easy to keep it clean as debris remains on top of the sand. Sand is a natural substrate, so any inhabitants of your tank will feel right at home along the bottom of the tank.

6. Potting soil

Potting soil planted tank substrate

CEC: High | Inert: No | Organic: Yes

Potting soil available from gardening centers can also be part of a good substrate for planted tank. Soil tend to contain appropriate amounts of humus and can be a valuable source of many nutrients, especially trace nutrients. Many aquarists have been using potting soil mix with sand and vermiculite as a substrate for years and really like it. I have heard of dozens of successes and very few failures. However, you have to be careful with potting soil. You’ll have to make sure to pick one that has had no additives or fertilizers added.

Potting soil will also leak ammonia which will trigger algae growth. A good way to fix this is to cook the soil for a good hour at 350F. This will turn the ammonia into nitrate.

Always top it off with another material. Otherwise, it will mess you water really bad. Let the soil in water six weeks before setting up the aquarium so all the initial chemical reactions will take place and the soil will “bubble up” most of the gasses from these reactions.

Keep in mind; soil contains organic materials that will eventually decay. You will have to replace it after a little while. It is better not to use too much potting soil.

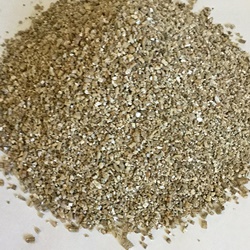
7. Vermiculite

Vermiculite sand fish tank substrate

CEC: High (82.0 – 150.0) | Inert: Yes | Organic: No

Vermiculite is a micaceous material resulting from an expansion of granules of mica at high temperatures. It should be mixed with other material and should not be used on it’s own. Always top it off with another material. I only found a few recipes that suggest the use of vermiculite. Vermiculite is characterized by its lightweight and high water-holding capacity.

Vermiculite gradually releases nutrients for plant absorption; on average it contains 5-8% available potassium and 9-12% magnesium. It can fix ammonium into a form that is not readily available for plant absorption. This fixed nitrogen is gradually transformed to nitrate by microorganisms, making it available for plant uptake.

8. Perlite

Perlite for aquarium planted aquarium soil

CEC: Very low (1.5 – 3.5) | Inert: Yes | Organic: No

A mineral of volcanic derivation that may be used in some substrate mixes. Perlite has a very low Captation exchange capacity, low water-holding capacity (19%), and neutral pH. The closed-cell composition of perlite contributes to its compaction resistance, enhances media drainage, and heightens the aeration of the substrate. Be aware of possible aluminum toxicity in acidic media (pH < 5).

Perlite contains, on average, 47.5% oxygen, 33.8% silicon, 7.2% aluminum, 3.5% potassium, 3.4% sodium, 0.6% iron and calcium, 3.0% bound water and 0.2% magnesium and trace.

Perlite is characterized by approximately 70% total porosity, 60% of which is aeration porosity. Perlite can retain two to four times its dry weight in water, which is much greater than that of sand, yet much less than the water-holding capacity of peat and vermiculite. Never use it on its own and always top it off with another material.

ALWAYS RINSE ALL AQUARIUM SUBSTRATE MATERIALS BEFORE TO USE!!!

How To Get Rid Of Aquarium Snails

By Aquabase | Last Updated Jan 27, 2019

fish tank snails

Fish tank snails one very popular addition in an aquarium. But, some aquarists love them, and some hate them. Snails would probably be more welcome in aquariums if they weren’t so prolific. A large population of snail aquarium can lead to the destruction of your aquatic plants and even upset the aquarium ecological balance.

Removing Snails From Your Aquarium

Here are a few tips on how to get rid of aquarium snails and help you to control fish tank snails.

1. Food Control

Overfeeding is the number one cause of snail outbreaks. If you see more and more snails in your tank, then there is a good probability that you are overfeeding. Before to try any other method of control, reduce feeding a little. This should help a lot.

2. Predation

Some fish species will eat snails. Some of the best at eating snails are the members of the genus botia such as the Clown Loach, Pufferfish, Bettas, Crayfish, most Gouramis, and Apple Snails will also prey on these snails.

3. Cleaning The Plants

Since Ramshorn snails are often introduced in the tank as egg bundles hidden in newly acquired plants, treating the plants can help a lot.

  • Chlorine Bleach – One way to treat hardier plants is to soak them in a solution of water and chlorine bleach for 10 minutes (20 parts of water, 1 part of bleach). When treating my plants with bleach, I always avoid treating the roots to not damaging them. A bleach bath should always be followed by an other bath with water containing a dechlorinating agent.
  • Alum – A more gentle treatment calls for 5-10 tablespoons of alum to 1 gallon of water for 2-3 days.
  • Snail Poison – Another way to treat the plants is to quarantine them and treat with snail poisons. This way, you don’t have to use poisons in the main show tank.
  • Salt – I know that some will tip the plant in saltwater for 5 minutes to kill the snails or aquarium snail eggs, but I don’t know how much salt they use for that.
  • Potassium Permanganate – Using one gallon of fresh water and a half tablespoon of potassium permanganate for soaking solution. Soak the plants for fifteen minutes, then rinse well before planting in your tank.

4. Manual Removal

Manual removal can also be an effective way to get rid of aquarium snail infestation.

Let them come to you – To help removing the fish tank snails an aquarium, some aquarist will use lettuce of cucumber to bait them. There are aquarium snail traps available to buy. These traps work quite simply by adding some food into a chamber that the snails can get into but can’t get out. If you don’t want to pay for a snail trap, get a small glass jar and put a small piece of lettuce or fish food in it. Carefully sink the jar on the bottom of the tank. The next day, remove the snails in the jar and repeat the process.

Stop Aeration – Another effective way to help to remove the fish tank snails manually is to stop the aeration. The snails need air, so they will soon climb to upper levels in order to breath. It is very easy to take them out as they reach the surface. The planted tank may not have an air pump since the plants alone are enough to supply air. In this case, leaving the light off for some time (plants only produce air during day time) might help.

5. Snail Poison

Chemical solutions, which can be purchased at any pet or aquaria store, kill snails and eggs effectively. Unfortunately, the most solution is copper-sulfate-based chemicals which will also harm the fish and any other living organism in your tank. For this reason, It is best to try to avoid this method. If you chose to use chemicals to kill snails an aquarium, make sure to vacuum and do frequent partial water changes to restore water parameters. You should also add some activated carbon to your filter after the treatment.

Best Way to Acclimate Fish To An Aquarium

By Aquabase | Last Updated Jan 21, 2019

acclimate fish

Acclimate Fish – All aquarium fish are sensitive to rapid changes in their environment. A sudden change can send them into shock and lead to death. We care about them so let’s do things the right way.

Floating bags from the store in your tank is not enough. Many people use this method, but this is wrong! It does nothing to acclimate your fish! All it does is adjust the water temperature of the bag to that of your tank. It does nothing for other water parameters.

Whatever how long you float the bag, if the water in it has a pH of 7.6, that will be a big shock for your new friend if you pour it into a tank with a pH of 8.3. Lights can overheat the water in the bag.

How to Acclimate Fish to a New Tank?

The following procedures help to acclimate new fish to adapt nice and slowly to new water conditions. :

Procedures:

  1. As soon as you get home with new fish, pour the bags into a water bucket. To acclimate fish, the bucket should be big enough, so the new fish is reasonably covered with the water. Don’t use new water or water from your tank! Just use the water that came with the fish. You may acclimate more than one fishes in the same bucket. Any poisonous, toxic, or aggressive animals should be acclimated individually.
  2. Now set the bucket on the floor next to the aquarium or quarantine tank.
  3. Using a plastic airline tubing, set up and run a siphon drip line from the aquarium to the bucket.
  4. This procedure must be really slow, so we now need to adjust the flow. This is where the air valve comes into play. Using the air pump or air valve, adjust the water flow coming from the tank to the bucket (A loose “knot” tied in the airline would do). Water should go through the airline one drop at the time (one drip per second is good). This way, the water that came with your new friend will slowly adjust to the tank condition.
  5. From here, things goes pretty much by them self. Let it drip for a good 30 min to 1 1/2 hours. Hardy fish should do well with shorter dip time while sensitive species might need more. Once this is done, test water in the bucket to see if water parameters match that of your tank water. If the answer is yes, the acclimation is complete.
  6. It’s now time to introduce your new friend to your tank or in a quarantine tank. Use the container that will submerge in the bucket and place the animal it. Then, remove the bowl with just a little water and your animal. Gently submerge the container into your tank or quarantine tank (do not throw or drop the fish from above the surface of the water).

When you acclimate fish, try to avoid adding water from the shipping bag to your tank. You don’t know what’s in it. It may introduce diseases or other undesirable things in your tank. The best is to throw out the water in the bucket. You may also turn off the lights and leave them off for 2-3 hours after the fish are introduced. This will help reduce stress.

The Best Algae Eaters

By Aquabase | Last Updated Mar 3, 2019

best algae eaters for freshwater and saltwater aquarium

In our efforts to keep the algae away from our aquariums, the best algae eaters can be great allies. Which fish species really eat algae? Not all fish can eat algae just several species of fish as algae-eaters. One of the common freshwater fish as a good algae eater is the Common Pleco.

Here is a short list of some of the most common freshwater and saltwater algae eaters I know.

Table of Contents

  • The Best Freshwater Algae Eaters
    • 1. Ramshorn Snail
    • 2. Butterfly Goodeid (Ameca splendens)
    • 3. American Flag-fish – Jordanella floridae
    • 4. Otocinclus catfish – Otocinclus Affinis
    • 5. Common pleco – Glyptoperichthys multiradiatus and Hypostomus punctatus
    • 6. Bristlenose Catfish – Ancistrus sp.
    • 7. Siamese Algae Eater – Crossocheilus Siamesis.
    • 8. Amano Shrimp – Caridina japonica
    • 9. Cherry Shrimp – Neocaridina denticulata sinensis
  • The Best Saltwater Algae Eaters
    • 1. Foxface Rabbitfish – Siganus vulpinus
    • 2. Surgeons or Tangs
    • 3. Turbo Snails
    • 4. Astraea Snails
    • 5. Trochus or Turban Snails
    • 6. Nerite Snails
    • 7. Abalone
    • 8. Scarlet Hermit Crab
    • 9. Emerald Mythrax Crab
    • 10. Tuxedo Urchin

The Best Freshwater Algae Eaters

Adding the best algae eater into your freshwater tank can help to reduce algae production from your aquariums. There are several different freshwater algae eaters to choose from, including shrimps, snails, and some algae-consuming fish. So, what is the best freshwater algae eater for the aquarium?

1. Ramshorn Snail

ramshorn snail - the best algae eater

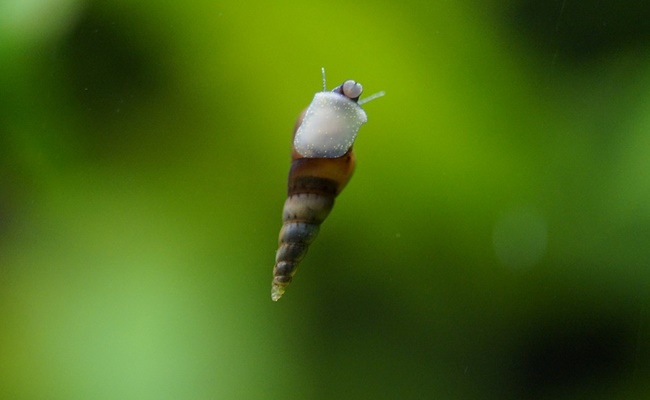
Ramshorn Snails (Planorbis Rubrum) is a common freshwater aquarium snail available. They reach sizes up to 2 centimeters and usually have red or brown coloring. Ramshorn Snails need to be kept in high alkaline waters with a pH level above 7. Ramshorn Snails is the best algae eater for cleaning your tank, plants, rocks, and the decorations.

Pros: Will rid the tank of algae.
Cons: Reproduces rapidly (chances of snail outbreaks). Can eat your plants.

2. Butterfly Goodeid (Ameca splendens)

freshwater algae eater fish

Pros: Eat green hair algae
Cons: can be aggressive to other tank inhabitants.

3. American Flag-fish – Jordanella floridae

american algae eater fish

Pros: Peaceful and easy fish. will consume hair algae as well as any Siamese algae
Cons: NA eater

4. Otocinclus catfish – Otocinclus Affinis

catfish freshwater algae eaters

Also known as Otocinclus catfish or simply Oto Cat is a small South American fish native to Brazil where it can be found in heavily vegetated streams and rivers. Otocinclus catfish is the best algae eater, and this is probably one of the reasons why it became so popular over the years. The Otocinclus catfish makes a great addition to the community aquarium. During the day, these fish usually rest on a leaf or stick to the glass of the tank. They become more active during night time. As said before, the Otocinclus catfish is herbivorous which makes it a good algae eater. Unfortunately, they don’t eat all kinds of algae; only eat soft green and brown algae, nothing else.

Pros: Won’t damage plants. Peaceful fish. Eats green and brown algae. Ideal for small tanks.
Cons: Acclimation can be difficult.

5. Common pleco – Glyptoperichthys multiradiatus and Hypostomus punctatus

common pleco algae eaters

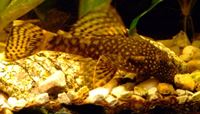
Hypostomus Plecostomus, also known as Pleco is native to South America where it can be found in many environments from rifles, river banks, and driftwood snags. They tend to be nocturnal and prefer hiding places such as plants, rocks, and bogwood in their environment. Pleco fish is very attractive and hardy. I think they and makes an excellent addition to larger tanks. Can keep a tank spotless and are often used to maintain the glass clean. This fish is well-known to clean the aquarium. This hardy fish will adapt to most aquarium conditions but avoid keeping it in extreme pH levels or temperatures.

Pros: Eats green, brush algae.
Cons: Will grow really large. May cause havoc in planted tanks. Older specimens don’t eat much algae.

6. Bristlenose Catfish – Ancistrus sp.

Bristlenose catfish

Pros: Good algae eater. Ideal for small tanks. Hardy fish.
Cons: NA

7. Siamese Algae Eater – Crossocheilus Siamesis.

siamese algae eater

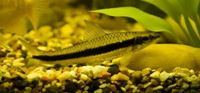
Crossocheilus siamensis, also known as Siamese Algae Eater or simply SAE is a freshwater fish in the Cibrinidae family (carp family). Native to the Malayan peninsula, the Siamese Algae Eater is a bottom-dwelling fish that lives in streams and rivers as well as the flooded forest where it feeds on algae, periphyton, and phytoplankton. This peaceful fish, but make sure there are algae for it to eat. The Siamese became famous as best algae eaters for freshwater tanks for its appetite for algae. It is true that is a great algae eater, but there is a limit to its appetite. They love driftwood/rocks and some plants that can support their weight to rest on. Amazon Sword plants are perfect for this fish. This fish can be shy so make sure to provide some hiding places.

Pros: Eats green, brush and brown algae.
Cons: They will also eat fine leaved plants including mosses, hairgrass, and mayaca.

8. Amano Shrimp – Caridina japonica

amano shrimp

Caridina Japonica, also known as Amano shrimp or Algae Eating Shrimp is native to Japan, Korea, and Taiwan where it can be found in swamps and marshlands. It was named Amano shrimp after the aquarist Takashi Amano, who noticed their appetite for algae and introduced them to the hobby in the early 1980’s. This shrimp is very useful in eliminating all types of algae, but they are not a solution against algae proliferation unless you have a large group (one or two per gallon). They will do well in a well-established aquarium. They are shy animals and prefer to be housed in large groups in tanks with plenty of plants, hiding places and peaceful fish that will not try to eat them.

Pros: Will eat almost any algae including brown, and hair algae.
Cons: NA

9. Cherry Shrimp – Neocaridina denticulata sinensis

red cherry shrimp

The cherry shrimp has long been a popular choice for aquarium hobbyists. Known as the Taiwan Shrimp, is found in southern China and Taiwan These is a captive-developed morph and is not found in the wild. This hardy and fascinating shrimp now finds its home in aquariums throughout the world. Its bright red color makes it a striking addition to just about any community tank, and its gentle nature means that it will not harass or harm the other residents of the aquarium. The cherry shrimp is the best algae eaters and a great choice for algae infested tanks since algae is one of its favorite snacks. Placing this algae rock near the front of the tank will allow hobbyists to watch their colonies of cherry shrimps as they feed.

Pros: Eats most types of soft algae and won’t eat plants.
Cons: sensitive to water conditions. You might need lots of them to do the job.

The Best Saltwater Algae Eaters

On the saltwater aquarium, too much algae can suffocate marine life, and too little is not healthy for animals who need algae in their diet. To control and get rid of algae in the saltwater aquarium you need some sea animal like fish and snail who eat algae such Surgeons or Tangs and Turbo Snails. For more details please check out our list of best saltwater algae eaters below.

1. Foxface Rabbitfish – Siganus vulpinus

foxface rabbitfish saltwater alga eater

The Foxface Rabbitfish is an attractive and hardy fish making it popular with beginners and experienced aquarists. It occurs in coral-rich areas of lagoon and seaward reefs where it is usually found singly or in pairs among Acropora where they feed on algae. Peaceful but should be housed individually when older as it will fight with other related species. The Foxface Rabbitfish will eradicate most algae in the tank, including cyanobacteria, diatoms, hair algae. The Foxface Rabbitfish is best algae eater fish that can be your favorite.

Pros: Will eat most algae, including cyanobacteria, diatoms, hair algae.
Cons: Poisonous dorsal spines.

2. Surgeons or Tangs

naso surgeonfish

This member of the sergeant fish family is one of the most popular fish in the hobby. It will bring bright color to any reef aquariums. This beautiful fish is also known as the Surgeonfish. It can grow up to 8 inches and has a bright color body with sharp spines near the tail (the white spot) used for defense and as an anchor when sleeping. Surgeonfish will eat filamentous algae and may also nip on stony and soft corals if underfeed. Surgeonfish safe to keep in a tank with most inverts, and are good fish for reef tanks with corals. They mainly eat brown algae in the wild they are susceptible to nutritional disorders in captivity.

Pros: Good algae grazers.
Cons: Not suitable for small tanks

3. Turbo Snails

turbo snail

Turbo snails are a great choice for algae eaters on reef tanks. Coming from the Gulf of California off the coast of Mexico and one of the best saltwater algae eater. They were excellent against green hair algae. They will be active during the day to graze on algae and go hide out at night. The maximum size only 3 inches.

Pros: Excellent against green hair algae.
Cons: Will bulldoze loose rocks. They cannot right themselves if they fall and land on their back.

4. Astraea Snails

astraea snails

Pros: Eat cyanobacteria, green and brown film algae (maybe not green hair algae).
Cons: They cannot right themselves if they fall and land on their back.

5. Trochus or Turban Snails

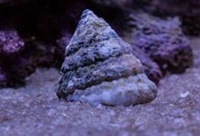
trochus snails

Pros: Eats green hair algae, slime algae, green algae, cyanobacteria and diatoms. They leave nothing behind.
Cons: NA

6. Nerite Snails

nerite snails saltwater

Pros: Eats cyanobacteria, green algae and algae film on glass.
Cons: They are intertidal

7. Abalone

green abalone snail

Pros: Some say it is the best herbivore for the reef aquarium.
Cons: May become somewhat of a nuisance.

8. Scarlet Hermit Crab

scarlet hermit crabs

Scarlet reef hermit crabs, also known as red legged hermits or red reef hermits, are mostly found in sandy areas near the reef, rarely on the reef itself. They have a very colorful appearance, with red legs, red body, and yellow eyestalks. Hermit Crabs with red legs and red face are not Scarlet hermit Crabs, they are Dwarf Red Tip Hermit Crabs. They are one of the most popular reef maintenance animals – The Saltwater Clean Up Crew. They often recommended for algae control.

Pros: Will eat red, green, brown, green hair algae.
Cons: Can do significant damage if introduced in large numbers.

9. Emerald Mythrax Crab

Emerald Mythrax Crab

Emerald Mythrax is a hardy crab found in the Western Atlantic Ocean. It has a flat green body with ten hairy legs. Emerald Mythrax will scavenge the tank at night for leftover food or algae and became famous to control bubble algae. You can keep more than one in your marine aquarium. Emerald Mythrax is semi-aggressive. It could attack fish but usually, do more good than harm. It’s good option as best algae eaters for your reef tanks.

Pros: Popular to control bubble algae (valonia).
Cons: May knock a few things over, so make sure to secure things down.

10. Tuxedo Urchin

Tuxedo Urchin

Tuxedo Urchin will hide during the day and goes out at night to graze on algae. More than one can be kept in an aquarium as long as there is enough food (algae) and shelter. If not enough algae in a tank, it’s diet should be supplemented with dried seaweed. Mespilia globulus may live up to five years. Tuxedo Urchin has five to ten broad-colored bands usually blue or black, with red, brown, or dark spines. Poor water condition will make it lose its spines. It may bulldoze coral polyps in your marine aquarium and make sure to firmly fix the rockwork so that it may not dislodge them.

Pros: Will graze on algae at night
Cons: NA

If you know any other fish or invertebrates that should be added to this list of the best algae eaters or would like to add some information to this list, please use the comment box bellow. Thanks!

How to Change Aquarium Water Easily

By Aquabase | Last Updated May 9, 2017

aquarium water change guide

I just realized I never wrote about those very important aspects of successful fish keeping: aquarium water changes. This might be obvious for many of us, but it is certainly not for everyone. Yesterday, at Aquariumbase.com I received two messages from people looking for an answer to their problems: The first tank wasn’t cycled after 6 months (can’t imagine how dirty) and the 2nd had a serious nitrate problem. Two problems that could have been avoided with regular water changes.

There’s no getting around it; very aquarium needs a water change once in a while.

How often should you change aquarium water?

There is no standard answer to the question of how often water should be changed. Many factors can influence how fast your water quality declines: tank size, the number of fish, feeding routine, etc. Some will need weekly water changes while others will do well with a water change every few months.

The best way to know is to test for nitrates. A nitrate test won’t tell you everything, but it is a useful indicator of water quality. As a rule of thumb, water should be changed when nitrates reach levels of 30 ppm (this is just a guideline). Some fish requires pristine water so take the time to know your fish (and invertebrates) before to decide what levels can be considered acceptable.

How much water changes?

Here again, all tanks are different. Ideally, replace about 10-25% of the tank’s water is safe. Just keep in mind that a 25% water change will only remove 25% the nitrate, phosphate, etc. Testing for nitrate will tell you a lot about how much should be changed. If your nitrate level goes from 10 ppm to 50 ppm within a week, you might want to change more water so you won’t have to change the water too often. If your nitrate levels goes from 10 pm to 15 ppm, smaller water changes should be good.

DON’T CHANGE TOO MUCH WATER! The more water you change, the more you risk to break the nitrogen cycle, make drastic chemistry change, etc. Unless you know what you do, 50% water change should be the maximum.

If you have a saltwater aquarium, don’t forget to add a marine salt every time you change the water to keep proper salinity in the tank.

How To Do Water Changes?

Material needed:

  • A siphon (Python type hoses are awesome!) -> See details
  • 2 buckets (if you don’t use a Python hose).
  • Water conditioner

Procedure:

1. If you use a Python hose, you may skip this first step. If you don’t use a Python hose, fill a bucket with fresh tap water. Add water conditioner to the water to remove chlorine. Make sure the water at the same temperature to that of your aquarium.

2. Unplug all electrical units: heater, filter, air pump (you can keep the lights).

3. Clean the inside glass using an algae scrubber, scraper, razor blade or sponge. Don’t use sharp objects on an acrylic tank!

4. Siphon the water with your siphon and vacuum the gravel at the same time. Push the siphon straight down into the gravel and then pull straight up to remove all the debris trapped in it. Repeat as you move across the bottom. You might not be able to completely clean the gravel when you do a water change, and this is ok. Do a different section of the gravel next time you do a water change. Don’t remove more water than what you have in the other bucket.

5. If you are using a Python hose, water will go directly down the drain. If you are using buckets, fill the other bucket with the water you siphon from the aquarium.

6. Now you can begin refilling. If you are using a Python hose and want to use water straight from the tap, allow it to run for a few minute to reduce the concentration of copper and heavy metals from household plumbing. Use this time to adjust the temperature to that of your aquarium. Once the aquarium if full, use water conditioner directly in the aquarium.

If you are not using a Python hose, gently pour the water bucket (the one with new water) into the aquarium. Refill the tank slowly to not disturb the gravel, plants and fish.

7. Open your filter and look at the filter media (cartridge, activated carbon, sponge, floss, etc…). It is advised to not clean or change filter media the same day you do a water change but at least you’ll know if you need to clean the filter later this week.

8. Dry your hands and plug in all your electrical units again.

9. Wipe down the hood and outside glass of your tank.

10. Record your activity in a maintenance log.

IMPORTANT NOTICE: Never use a glass cleaner or any other chemical to clean your tank.

That’s it! Remember that nothing can take the place of routine water changes to keep your water clean and your fish healthy. It seems like a lot of steps, but once you get the hang of it, it doesn’t take very long to complete this procedure.

Biotope Aquarium Explained

By Aquabase | Last Updated Jan 30, 2019

biotope aquarium

In a biotope aquarium, the aquarist attempt to simulate a natural habitat, assembling fish species, plants, water chemistry and decorations found in that specific ecosystem. A “true” biotope should be a mirror of a natural habitat.

There are many good reasons for setting up an aquarium that simulates a natural habitat. Those of us who have done everything bred everything and kept most fish might simply want a new challenge. Another good reason to set up a biotope aquarium is to see the fish interacting in their “natural” environment which is completely different from what you will see in a community setup.

Several types of Biotope Aquarium

In my opinion, there are several types of biotopes.

1. The true Biotope is a recreation of a specific environment. Everything kept in a true biotope aquarium should be found together in an area that fits within the dimensions of the tank. It should be a “chunk” of a real natural environment. An example of this could be a small channel of the Amazon River where small fish take refuge among driftwoods, plants, and dead leaves.

2. The Habitat tank can be a good option for those who do not want to deal with all the requirement a true biotope involve. Instead of using organism from a specific ecosystem, we get a little looser and use organism from multiple areas of a given body of water. As an example, an Amazon habitat would include fish, plants and decoration from anywhere in the river, as long as they can be found in the Amazon and its tributaries.

3. The theme tank doesn’t even come close to a biotope but since many aquarists consider it as one, why not include it here. In a theme tank, we use organism from an entire country or continent. The traditional “Asian” or “African” tanks where fish, plants, and decoration are from anywhere on the continent are good examples.

Here are some popular biotope aquarium ideas:

  • SOUTH AMERICA: Blackwater Creek, Whitewater River, Clearwater Stream, Oxbow Lake
  • AFRICA: Lake Malawi, Lake Tanganyika, Lake Victoria, Madagascar
  • CENTRAL AMERICA: Cenotes Cave system, Fast-Moving Stream, Mangrove Estuary, Livebearer Habitat
  • ASIA: Thai Creek, Indian/Burmese River, Asian Blackwater Pool, Asian Mangrove Estuary
  • AUSTRALIA: New Guinea River, Rainforest Creek

1. Lake Malawi Biotope

lake malawi aquarium biotope

Lake Malawi aquarium biotope is an African Great Lake located on the East side of the continent. The lake is about 375 miles (604 km) long by 53 miles (85 km) wide, making it the third largest in Africa and the eighth largest lake in the world. This large rocky lake is the home of the well-known African Cichlids which are endemic to the lake. A total of 280 cichlid species has been described, although biologist has reasons to believe there might be up to 500 cichlid species living in the lake.reasons to believe there might be up to 500 cichlid species living in the lake.

Malawi cichlids are divided into two groups: the haplochromines which are those commonly seen in the aquarium trade and the tilapiines. Within the first group, Haplochrominae, there are two subgroups. Both subgroups require different environments which are something that you should consider when setting up the tank. The first one, known as Haps, consists of open water and sand-dwelling species. The second subgroup is known as mbuna, which means “rockdwellers.” The Mbuna fish are smaller, and both sexes are often brightly colored, although in some species the females may be brownish overall. The second group, the tilapiines, consists of the only substrate-spawning species in the lake (Tilapia rendalli), and four species of chambo (Nyasalapia).

The water in Lake Malawi is slightly alkaline with a pH ranging from 7.7 to 8.6, a dH of 6-10, and a conductivity of 210 to 285 µS cm. Given its tropical latitude, the water of this lake is generally warm, having a surface temperature that ranges from 75 to 84 °F (24 to 29 °C), with a deep water temperature of about 72 °F (22 °C ), year round.

2. Malawi Tank

Mbuna cichlids will require a tank with a built up rocky environment as they use caves for breeding and as boundery markers to mark their territory. Some good rocks are river rocks, slate, and limestone (limestone will buffer the water). As a substrate, sand and/or gravel can be used but it is better to use a sandy substrate rather than gravel as it gives a more natural environment.

Haps cichlids will require plenty of open swimming space with just a few boulders or rocks scattered on the floor of the tank. They less aggressive then Mbuna cichlids and do not need caves. Again, sand would make a perfect substrate.

Fish: Lake Malawi cichlids

Plants:

Vallisneria species are the only available plants I know (Vallisneria is native to both Malawi and Tanganyika). Those willing to bend the biotope rules a little could also add some Annubias.

3. Lake Tanganyika Biotope

Lake Tanganyika Biotope

Lake Tanganyika aquarium biotope is an African Great Lake estimated to be the second or third largest freshwater lake in the world by volume. This large rocky lake is also known to be the second deepest lake (1,470 m) next to L. Baikal in Siberia and the longest in the world (670 km). Almost 1/6 of the world’s freshwater is contained in this 9-12 million years old lake.

Located along the East African Rift, Lake Tanganyika is home to a large amount of fish. According to Wikipedia, at least 250 species of cichlid and 150 non-cichlid species inhabit the lake. Almost all (98%) of the Tanganyikan cichlid species exist nowhere else in the world outside the Lake Tanganyika watershed. The lake also contains one of the only freshwater jellyfish, numerous mollusks, sponges, and aquatic snakes that are endemic as well.

Lake Tanganyika is a large lake with many different habitats. The rocky shore, the open water, and the sandy bottom are some of them.

The first one, the shallow rocky shore is characterized by the presence of rocks on a sandy substrate. Rocks in this area can vary in size, from small pebbles to bigger rocks like footballs.

Another rocky habitat is the “rocky sediment free habitat” where the rocks are much larger in size. There is no sand for the rocks to rest upon in this habitat and the rocks are often covered with algae which attract many herbivores cichlids.

Deeper in the lake is the sandy habitat where we can find sand-dwelling, shell-dwelling and schooling species. This area is characterized by large sandy surfaces, few rocks here and there and an abundance of abandoned snail shells.

The open water habitat is naturally very big. Huge schools of fish are often seen in this area. A few cichlid species live in the open.

The water in Lake Tanganyika is alkaline with a pH ranging from 7.8 to 8.8 and is medium hard with a dH from 7-11. The water of the lake is generally warm with a surface temperature that ranges from 73 to 88 °F (23 to 31 °C). However, most fish species inhabit areas with a temperature from 75-84 °F (24-29 °C ).

4. The Tanganyika Tank

Like any aquarium biotope, a Tanganyika biotope should be as close as possible to the natural ecosystem. As said above, many different ecosystems are present in this large lake. In most cases, Tanganyika cichlids will fall into two or three scenarios: rocky, open water or sandy environment.

For Tanganyika cichlids that inhabit rocky areas of the lake, the biotope aquarium should be built up with plenty of rocks, tunnels, crevices, caves and overhangs to serve as spawning sites and, more importantly, hiding places for harassed fish. Each fish will establish its own territory. Thus it is important to provide a shelter for each fish. A coral sand bottom should be used to buffer the water at an alkaline level Julidochromis cichlids are common in this habitat.

For cichlids from sandy bed areas of Lake Tanganyika, the biotope aquarium should have a sand substrate (read more about substrate aquarium here) with snail shells where sand-dwelling cichlids will seek shelter and spawn. Here again, coral sand can be used to buffer the water. Some cichlids from this area are Neolamprologus multifasciatus, Neolamprologus brevis, N. occellatus, N. mealegrise, N. caudopunctatus, N. signatus, Altolamprologus compressiceps and A. calvus.

An open water biotope should provide plenty of open water to swim around. Unlike most other Lake Tanganyika species, males cichlids from this environment will not need any decor, rocks or sand to mark their territories. However, female will need some hiding places where they can hide as they cannot get way from the male in an aquarium. A sandy substrate can be used to mimic the natural conditions of the lake. Cichlids from this environment include: Cyprichromis leptosoma, C. microlepidotus, C. pavo, C. sp. leptosoma jumbo and C. sp. “Zebra”.

Whatever you chose to go with a rocky, open water or a sandy biotope environment, all Lake Tanganyika cichlids must be provided with large open swimming areas. The water chemistry should match that of the lake with a temperature of 75-84°F (24-29°C), a pH from 7.5-9.0, and a water hardness from 7-18 dH.

Fish:

Lake Tanganyika cichlids including snail shell-dwellers, Synodontis, Afromastacembelus eels, Tanganyika Rainbowfish.

Plants:

Vallisneria species are the only available plants I know (Vallisneria is native to both Malawi and Tanganyika). Those willing to bend the biotope rules a little could also add some anubias.biotope rules a little could also add some anubias.

Setting Up Quarantine Tank And Invertebrates

By Aquabase | Last Updated Jan 30, 2019

how to setup a quarantine tank

How to setup a quarantine tank and why do you need to quarantine the fish tank? A quarantine tank (QT) is a very important accessory for any responsible aquarist. The whole point of quarantine is to prevent problems in the main tank and protect your investment. Why take the chance of introducing pest or diseases into a healthy tank or why should we let a sick fish contaminate the others. So, how to set up a quarantine tank?

Quarantine for new livestock

Before to introduce any newly acquired fishes in your main tank, it is wise to assume they might carry something you don’t want. It is much easier to fix problems in smaller tanks and, if anything goes wrong, all you risk is what’s in the quarantine tank, not the entire system.

So it’s simple; you get new live stock, you quarantine and then, after a couple of weeks, you introduce it into your tank.

Medical use

When a fish is sick or injured, it is wise to remove it from the tank and move it to a quarantine tank. This way, there is less chance the whole community get affected by the illness.

Using a quarantine tank to treat sick fish will also make you save money, as medication for a small tank is less costly than it is for a large tank.
Also, invertebrates and many micro-organisms may be in may be harmed by some medication, so that’s the other reason to not use the medication in the main tank.

Finally, being sick in the main tank can be stress full for the fish. It has to fight against the fish disease and deal with all other fish at the same time. A stress-free environment will help it recover.

How to setup a quarantine tank ?

Equipment required for a quarantine tank:

  • 10-gallon tank (larger if needed) with cover and light.
  • Hiding place for the fish. Many people simply use a few pieces of 6″ long PVC.
  • heater and thermometer
  • air pump with an airline and air stone
  • biologically active sponge filter
  • net
  • ammonia test kit
  • nitrite test kit
  • antibacterial and anti-parasitic medicated food
  • NO SUBSTRATE

Setting up quarantine tank the same way you’d set up any tank but don’t use a substrate. At this point, the tank should be empty with only the heater and air stone in it. Next, fill it with water from your already established aquarium, add the PVC pipe pieces, insert the heater, and set up the filter and air pump.

That’s it! You have a quarantine tank.

Be ready!
Always have some extra saltwater ready in case an emergency water change is needed. Never use freshly mixed water to a tank!

Quarantine procedures:

1) Setup your quarantine tank.
2) Catch your fish and acclimatize it to the quarantine tank.
3) Use recommended medication for the disease. During that process, monitor your main tank and look for signs of disease on other fish.
4) Once your fish look healthy again, you should always wait for a good week before to move it back to the main tank (just to make sure).

  • Page 1
  • Page 2
  • Go to Next Page »

Primary Sidebar

Search Here

  • Facebook
  • Pinterest
  • Twitter

Disclosure

This post contains affiliate links. For more information, visit my disclosure page.

As an Amazon Associate I earn from qualifying purchases.

About Us

We are here to help you choose the right “Aquarium Equipment” by creating original reviews on which “Aquarium Supplies” are better for their value.

Our main aim is to help you to choose the right fish, equipment, tank, articles reviews both freshwater and saltwater aquariums.

Aquariumbase.com is a participant in the Amazon.com Services LLC Associates Program, an affiliate advertising program designed to provide a means for sites to earn advertising fees by advertising and linking to amazon.com, amazon.co.uk, amazon.ca, and any other website that may be affiliated with Amazon.com Service LLC Associates Program. Amazon and the Amazon logo are trademarks of Amazon.com, Inc., or its affiliates.

As an Amazon Associate I earn from qualifying purchases.

Copyright © 2026 · AquariumBase

We use cookies to ensure that we give you the best experience on our website. If you continue to use this site we will assume that you are happy with it.AcceptRead more